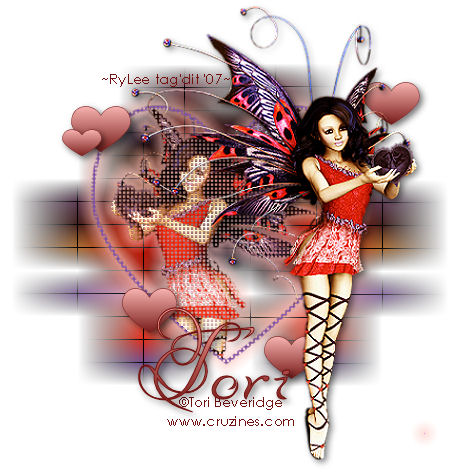
Confetti Heart
You will need
PSP
Tube and font of your choice
Or
My tube HERE
Toadies Filters
Open a 500 x 500 new image, transparent.
We're going to draw the big heart Go to Shapes and select your heart. Create as vector and anti alias checked. Line Style solid and Line Width 5. I used color #761F1E for my outline, you may wish to use a different color to compliment your tube.
Draw your heart as big as you like, leaving room for the effects.
If you drew it upside down: Image - Flip
Position it in the center of your tag.
Layers - Convert to Raster Layer.
Take your magic wand and select inside your heart.
Selections - Modify - Expand by 2
Copy and paste your tube "into the selection". Selections - Select None. Duplicate this layer.
Hide the duplicate heart layer and highlight the bottom one.
Effects - Plug Ins - Toadies - Ommadawn
Cell Width - 31
Cell Height - 11
Sharp/Soft - 234
Cell Edges On/Off - 17
Unhide and highlight your duplicate layer now.
Effects - Texture Effects - Mosaic Glass
Columns 100
Rows 100
Symmetry unchecked
Glass Curvature 76
Edge Curvature 66
Grout Width 2
Grout Diffusion 0
If you notice any scatter outside of your heart, mine was in the lower right corner of my tag, use your selection tool or eraser tool to get rid of it.
Resize your heart.
Image - Resize 80% All Layers unchecked. Adjust - Sharpness - Sharpen
Now for the pink effect around the heart. Effects - 3D Effects - Drop Shadow
Vertical 5
Horizontal 5
Opacity 85
Blur 5
Shadow Color I used #D88E8F You may wish to use another complimentary with your tube.
Repeat the drop shadow, but change the Horizontal to -5, everything else the same.
Copy and paste your tube as a new raster layer.
Image - Resize 80% All Layers unchecked. Adjust - Sharpness - Sharpen
Move it to where you think it looks best.
Effects - 3D Effects - Drop Shadow
Vertical 2
Horizontal 2
Opacity 45
Blur 5
Color Black
Now add your text. I used the Font Lovelight.
Size 72 Stroke Width 1
Foreground Color #761F1E
Background Color #F5D1D0
Or two colors which compliment your tube
and use the Gradient - Foreground-Background Fade. Create as vector.
Move it to the position you like. Go to Effects - 3D Effects - Drop Shadow and apply the same drop shadow you used for your tube. Say yes to changing the vector to a raster layer.
Now, go back to your Shapes. We are going to draw a small heart. Change your line width to 1 and use the colors you used for your text. Apply the same drop shadow as before to this little heart and move to where you like it. Duplicate this heart as many times as you like and resize the hearts to different sizes (all layers unchecked when you do) and move them to where you think they look best.
Lots of layers!
We're almost done! Add your artist's copyright on a separate layer and your watermark if you use one.
Layers - Merge Visible
Resize if you like, don't forget to sharpen if you do.
File - Export as a jpg and you're done.
Samples of This Tut Done by AMI License Holders

Tag made by RyLee with these modifications: Instead of a drop shadow around the big heart, RyLee used Eye Candy - Gradient Glow. I think it looks great! Thanks RyLee!
Thank you to Saturn Alice for giving permission for the use of her artwork.
To license my tubes (Tori Beveridge aka Cru), visit Artistic Minds Inc.
Or, you may use my free tubes which can be found HERE.