|
Ommadawn Sweetie
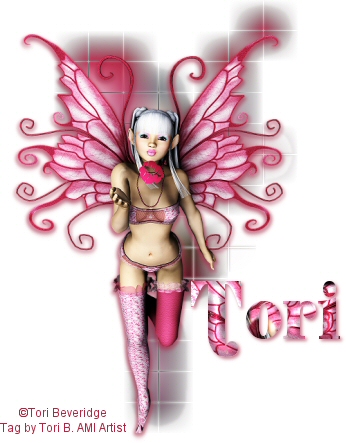
 You will need PSP Tube and Font of your choice Toadies Filters Transparency- Eliminate Black Filter Open a 500 x 500 new image, white. Open and copy and paste your tube as a new layer. Put your tube to one side. We will be using it again later. Duplicate this layer. Hide your duplicate layer and highlight the original tube layer. Effects - Plugins - Toadies - Ommadawn with these settings: Cell Width 18 Cell Height 16 Sharp/Soft 234 Edges 17 Take your Magic Wand and select the black lines. Effects - Plugins - Transparency - Eliminate Black The lines will disappear. Selections - Select None Unhide your duplicate tube layer and move it slightly off centre. Effects - 3D Effects - Drop Shadow with these settings: Vertical 2 Horizontal -2 Opacity 65 Blur 5 Using a complimentary color from your tube for the shadow. Repeat the Drop Shadow, changing the Horizontal Setting to 2 Now to add your text. I used the font Shifty Chica - Size 72 Create as Floating with Anti alias checked. Use background only, no foreground, any color at all. Clone Brush - Clone - Default Brush, Size 50, Hardness 100, Step 25, Density and Thickness 100, Rotation 0, Opacity 100, Blend Mode Normal Reopen your tube. Hold the shift key on your keyboard down, while holding the right mouse button down and drag your mouse over the part of your tube you would like to clone into your text. Then go to your text and holding the left button down (release the shift) drag &"clone" into your text. Repeat this until you are happy with the way it looks. It will take a few repeats before your text will be filled up. Promote your floating selection to a raster layer. With the ants still marching, Effects - 3D Effects - Inner Bevel Bevel #2, Width 10, Color - White and these settings Smoothness 55 Depth 26 Ambience 14 Shininess 12 Angle 315 Intensity 30 Elevation 88 Effects - 3D Effects - Drop Shadow, same shadow color as before, with these settings: Vertical 2 Horizontal 2 Opacity 65 Blur 5 Selections - Select None Add your artist's copyright as a separate layer if not already embedded. Delete your background layer. (the very bottom layer) Layers - Merge - Merge Visible Copy and Paste as a new image to get rid of the excess around your tag. Export as a .jpg and enjoy! Please DO NOT copy this tutorial to put online, pass out or re-write without my permission. You may link to them or print them out for your own personal use. |