Today I’m sharing faces 5, 6, 7 and 8 with you. Faces 5, 6 and 7 are actually steps in my work to make face 8.
Let me show you.
Today’s final portrait started out in the Poser program, which is a 3D modeling program. I use Poser 7. Working in Poser is a bit like being a doll maker or sculptor, except instead of knives and chisels, you spin dials to sculpt or morph your figure. In Poser, I start with a pre-made figure, Victoria 4.2, which is sold by Daz3D.
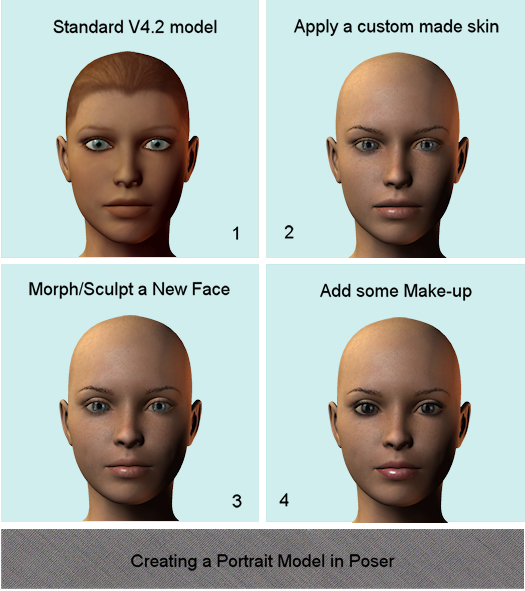
In the picture below, you can see in Frame 1, Victoria, the figure I start with.
Frame 2 shows Victoria again, but I’ve now applied a custom made skin texture to her, changing her enough for me to call this Face #5. Making texture skins for Victoria is an art form in itself and takes many hours of painstaking work. Once you’ve made a skin texture, you use it and use it and use it, trust me, I know. For this portrait though, I’m using a purchased texture, Kay, made by Maforno, available at Daz3D. I usually don’t add the texture at this stage, but I wanted to show you the difference it can make.
Face #5, looks so much better than Frame 1 that I could use her in my art, but I want to make my own unique morph.
Frames 3 and 4 show Face #6. She is the result of my dial spinning. I really enjoy this part. I sculpted her using the many dials for every part of her face you could think of, from lacrimals to nostril height, jaw angles, cheek width, to, well, everything.
In Frame 4 I have added some “make up” to the face and changed her eyes from blue to brown. I’m happy with her look.
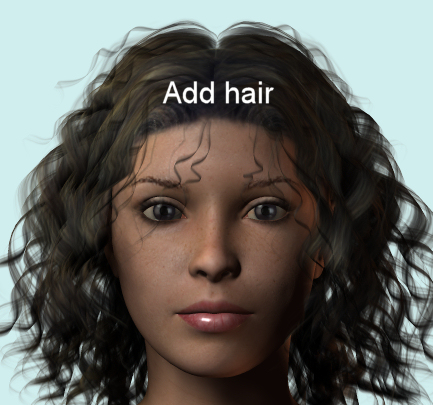
She does need hair. I am not a big fan of 3D rendered hair, preferring to paint the hair, but I do use it from time to time. Today is one of those times. Which brings us to Face #7.
Face #7, is this one, of my morph with hair.
The hair really finishes her look, but she’s rather lifeless, staring off into space like a doll. She needs personality.
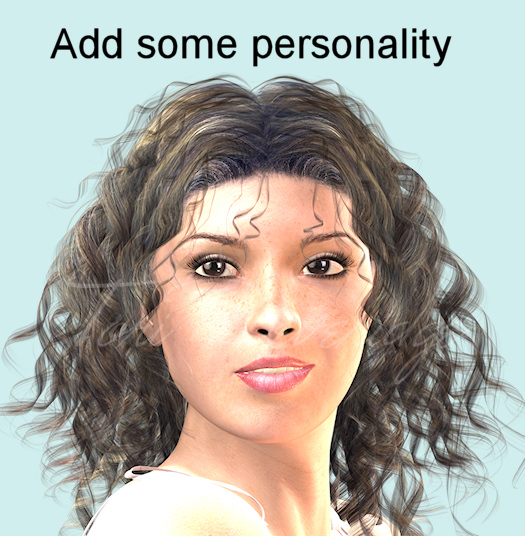
To do this, I dress her, pose her, give her expression, change the lighting and then render. It takes three long hours for Poser to give me the finished image.
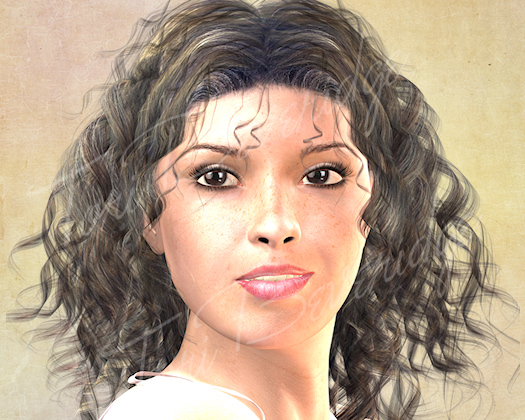
This is Face #8
Much better, but she’s still not finished. When I finished in Poser, she was saved as a .png file, with a transparent background.
In Photoshop, I add a simple background.
This background is actually one of Kim Klassen’s beautiful textures, which she makes as texture overlays for photography editing.
Looking better, but there are some improvements to be made. The eyebrows need to be darkened, the lighting and skin color is conflicting.
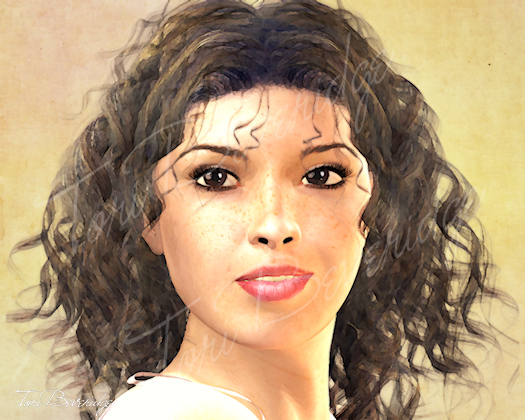
I make a few adjustments, using painting techniques and filters.
This is my final version of Face #8.
To me she looks like a Beth, so I’ve named this “Portrait of Beth”.
I hope you’ve enjoyed seeing my journey in making this portrait.
To see more portraits and beautiful faces and art, visit


I am absolutely stunned by this! Really, really gorgeous – and I'm so impressed by allll that goes into it. AND your end results are amazing, xoxo
Thank you so much Kristin. Your comment means so much to me.
Tori xo 🙂
Totally stunning – this is amazing 🙂
IKE xxx